
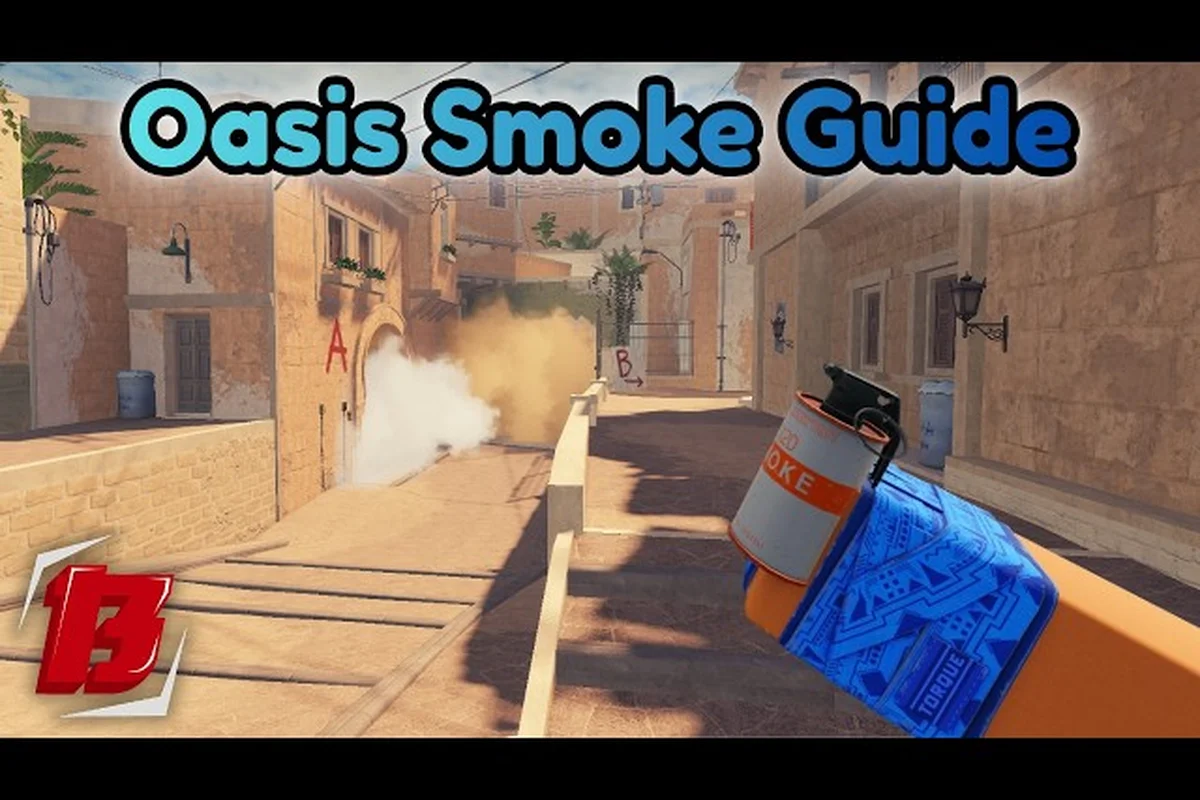
Utility wins more rounds in BloxStrike than raw aim, and mastering smoke spots is the single biggest upgrade most players can make. The right throw blocks a sightline, sets up a plant, and gives your team free map control without ever firing a bullet. This guide breaks down the nade lineups, flash positions, and spawn-based reads that turn utility from a guess into a guaranteed round win.
How Utility Shapes BloxStrike Map Control
BloxStrike is a 5v5 tactical shooter on Roblox where attackers plant the bomb and defenders hold or defuse, and every round lives or dies on who controls the map's chokepoints. According to the BloxStrike official Roblox page, the round economy rewards smart utility use — buying smokes, flashes, and nades with round cash instead of hoarding for rifles often swings more rounds than saving for a bigger gun. Community testing on the r/bloxstrike subreddit consistently shows that teams using coordinated utility win the opening 30 seconds of most maps.
Map control in BloxStrike follows a simple principle: the team that sees the enemy first usually wins the fight. Smoke spots exist to deny that vision. A well-placed smoke blocks a defender's off-angle, an attacker's crossfire, or a CT's information gather, which lets your team move through space that would normally be a death sentence. The maps in the current rotation — including Oasis and Reactor — all funnel into a handful of critical sightlines that utility can shut down entirely.
The three utility types each serve a distinct role in taking map control: smokes deny vision so attackers can cross sightlines, flashes blind defenders for split-second entries, and HE grenades plus Molotovs force opponents off stacked positions or punish post-plant attempts. Mastering when to deploy each one — rather than hoarding utility for a rifle round — is the foundation of every nade lineup below and the reason coordinated teams consistently win the opening 30 seconds on maps like Oasis and Reactor.
| Utility Type | Primary Purpose | Best Used For | Cost Tier |
|---|---|---|---|
| Smoke | Block enemy sightlines | Crossing open ground, isolating fights, safe plants | Low |
| Flashbang | Blind enemies before entry | Pop-flashing corners, forcing CT off an angle, retakes | Low |
| HE Grenade | Deal area damage | Softening stacked defenders, finishing low-HP enemies, post-plant denial | Medium |
| Molotov | Force enemies off position | Clearing common camping spots, denying defuse, delaying pushes | Medium |
Mid control is the single most important objective on most BloxStrike maps because the team holding mid can split defender attention and attack either bomb site with numbers. Smoke spots on mid doors, mid windows, and mid catwalks are therefore the highest-value lineups in the game. If you only learn one category of throws, learn the mid smokes first.
Core Smoke Spots Every BloxStrike Map Shares
While each map has unique angles, most BloxStrike maps share a structural pattern: two bomb sites connected by a mid area, with long sightlines from spawns into the middle of the map. This shared geometry means certain smoke categories appear on nearly every map, and learning the pattern saves you from memorizing dozens of disconnected throws.
One-Way Smokes and Vision Denial
One-way smokes are throws where you can see the enemy but they cannot see you, usually because the smoke clips into a wall or box on your side. The BloxStrike engine allows certain surfaces to render smoke thinner than on the opponent's client, which the community has exploited to create one-way setups at common plant spots. Community testing suggests these clips are map-dependent — not every wall has a one-way — but on Reactor and Oasis, the smoke at the default plant position is a confirmed one-way for attackers on most servers.
Standard two-way smokes are still the backbone of utility use because they work consistently on every server and never get patched. The goal of a two-way smoke is not to see through it but to make the enemy waste utility or time re-positioning around it. A defender who has to rotate away from their angle is a defender who is not holding the angle, and that free space is map control you have just purchased for the cost of one smoke grenade.
Map Spawns and How They Shape Utility Lineups
BloxStrike map spawns are fixed for the first 10-15 seconds of each round, which means defenders know exactly where attackers are coming from. Attackers know exactly where defenders are holding. This symmetry makes utility lineups predictable in the best way — both teams run the same throws every round, and the team that executes theirs faster usually wins the opening duel.
The attacker spawn sits roughly 20-25 seconds of walking from the bomb sites, with mid access about halfway. The defender spawn is closer to the sites but requires time to set up crossfires. This timing gap is where smoke spots earn their value: a smoke thrown at round start can land on a defender's angle before they even arrive, which forces them to either push through blind or take a longer, less optimal rotation.
| Map Section | Attacker Time to Reach | Defender Time to Reach | Utility Window |
|---|---|---|---|
| A Site | 22-25 seconds | 8-12 seconds | Defenders set up first |
| B Site | 22-25 seconds | 8-12 seconds | Defenders set up first |
| Mid | 12-15 seconds | 10-14 seconds | Contested — utility decides it |
| Spawn exits | 0-3 seconds | N/A | Attackers have free setup time |
The mid row in that table is the key takeaway: both teams arrive at nearly the same time, and the team that gets utility down first usually wins mid control for the rest of the round. Practice the mid smoke lineup for every map you play — that one throw will decide more rounds than any aim trainer.
Nade Spots and HE Grenade Lineups
HE grenades deal a burst of area damage that softens or kills grouped-up enemies, and the best nade spots in BloxStrike cluster around common defender stacks. Rather than throwing at random, the meta on most maps revolves around a handful of pixel-perfect lineups that bounce off walls and detonate at head height in known positions.
Default Nade Spots Per Map Category
Maps in BloxStrike fall into three broad structural categories—two-site open, mid-heavy, and vertical—and the smoke and nade spots that work on one map of a category usually transfer to the others with only minor pixel adjustments, since the geometry of the nade lineups shares anchor walls like the catwalk corner on Reactor or the upper-mid box on Oasis. Learning the shared pattern saves a huge amount of memorization time and lets you focus on map-specific spawn reads, defender stack positions, and mid control timing instead of re-learning identical lineups from scratch each match.
-
Two-site open maps (Reactor, similar layouts): nades target the back-corner stacks defenders use when no utility is thrown. Bounce off the catwalk wall to land in the back corner.
-
Mid-heavy maps (Oasis, similar layouts): nades target the mid connector choke, which defenders must hold to control rotations. Bounce off the upper-mid box to detonate on the connector floor.
-
Vertical maps (multi-level layouts): nades target the lower-site common positions through elevated floor grates, which only some maps allow.
The HE nade's 50-damage core and 25-damage edge means a direct hit on a stacked defender often drops them to one-shot range, which a teammate can clean up. Community data on r/bloxstrike reports that a well-timed HE nade at round start leads to at least one entry kill in roughly 35-40% of rounds on the maps with the best lineups.
Damage Falloff and Stack Spots
The HE nade's damage falls off sharply past its blast radius, so stacking two defenders in the same corner does not double the value — it spreads it. The maximum-damage core covers about a 2-meter radius, and the edge damage covers about 4 meters. A defender standing 5 meters away takes zero damage. This falloff means the best nade spots are tight, enclosed corners where defenders are forced into close proximity, not wide open areas where they can spread out.
| Stack Spot Type | HE Effectiveness | Why |
|---|---|---|
| Back-corner site stacks | High | Tight space, defenders group up |
| Mid connector choke | High | Narrow path, forced grouping |
| Open site plat | Low | Defenders spread out across the plat |
| Long-range holds | Very low | Out of blast radius |
| Behind box cover | Medium | Bounce lineups can reach them |
The most underrated nade spots are the ones that detonate after a short delay behind cover — these are often called "post-plant nades" because attackers throw them after planting the bomb. The nade bounces into the air and detonates over the bomb, which forces defenders to either back away from the defuse or take the damage. If the defender takes the damage, they are now at 25-50 HP and easy to kill. If they back away, your team has a few extra seconds to find the defuse.
Flash Spots and Pop-Flashing Entries
Flashbangs blind any player looking at them when they detonate, and the best flash spots in BloxStrike are pop-flashes — throws where the flash bounces once and detonates in the air almost immediately, blinding defenders before they can turn away. A pop-flash is the difference between a free entry and a feed; learning these throws is non-negotiable for anyone serious about the game.
Pop-Flash Mechanics
A pop-flash is a flash thrown with a high arc that detonates the moment it clears the wall or corner the defender is holding. The defender has maybe 0.3-0.5 seconds to react, and in most cases that is not enough to turn away. The setup involves throwing the flash against a wall, ceiling, or floor in a specific spot so the detonation happens at the perfect height and distance to blind the angle.
The most reliable pop-flash positions in BloxStrike are the ones that bounce off the ceiling just above the defender's position. The flash detonates about a meter above their head, and the entire cone of their vision goes white for 2-3 seconds. That window is more than enough time for your team to swing the corner, get the entry kill, and establish site control.
Map-Specific Flash Categories
Understanding the throw's purpose is what separates a useful flash from a wasted one, because the same grenade type can behave very differently depending on the arc, the bounce surface, and the timing relative to your team's push. For example, an entry flash on BloxStrike's Mirage-style Mid maps usually needs a 1.5-second fuse pop above the site ceiling, while a retake flash on the same map calls for a low pop-flash over a 128-unit box with only a 0.3-second pop delay. Matching the lineup category to the tactical category is the foundation of every BloxStrike flash spot guide.
-
Entry flashes: thrown at the start of a site execute to blind the entire site. Usually a high-arc ceiling bounce.
-
Retake flashes: thrown when your team is re-entering a site the enemy has taken. Usually a pop-flash over the box the defender is holding.
-
Self-flashes for info: thrown short distances to scout a corner without exposing yourself. Low risk, low reward but useful for map control.
The retake flash category is the most valuable for newer players because the lineups are consistent and the payoff is huge. A defender holding a site from an off-angle cannot hear a flash coming if it pops over their head — they only see the white screen. By the time their vision clears, your team has already swung and won the duel. For a deeper look at the utility types covered here, the BloxStrike smoke and utility guide breaks down the damage and duration stats of every grenade in the game.
Mid Control Strategies and Map-Specific Reads
Mid control is the most important objective in BloxStrike, but the way you take mid varies by map and by round. Some rounds call for a fast mid take with full utility; others call for a fake and a slow A execute. The skill is reading which strategy fits the current round state, and the foundation of that read is understanding your team's utility budget versus the enemy's.
When to Take Mid Fast
Fast mid takes work when your team has more utility than the enemy and you are on a winning streak of rounds. The logic: you have smokes, flashes, and HE nades, and the enemy is saving for rifles. Throw the smoke at mid doors, pop-flash the mid window, and HE nade the mid connector. Your team walks through the smoke before the defenders can react, and you now have a free mid player splitting the defender rotation.
The risks are real, though. If the enemy has an AWPer holding mid with a flash peek ready, a fast mid take feeds them three easy kills. Fast mid only works when your team's utility advantage is genuine, not theoretical. Community testing on r/bloxstrike reports that fast mid takes succeed about 60% of the time when your team has a full utility buy and the enemy does not.
When to Fake Mid and Hit a Site
Fake mid strategies work when the enemy is over-rotating to defend mid and leaving a site lightly held. The setup: throw one smoke and one flash at mid as if you are taking it, then immediately rotate to A or B with the rest of your team. The defenders who shifted to mid are now out of position, and the site you hit is held by one or two players instead of three.
The fake requires discipline — your team must commit to the rotate after throwing the fake utility, not peek mid. A failed fake, where the team keeps peeking mid anyway, wastes both the utility and the time, and you end up taking neither mid nor a site. The mid smoke and flash spent on the fake cannot be recovered for the site execute, so the call has to be clean.
Map Strategy Comparison Across the Rotation
| Strategy | Best Map Type | Utility Cost | Risk Level | Reward |
|---|---|---|---|---|
| Fast mid take | Open mid maps | High (3+ pieces) | High | Full map control |
| Fake mid + hit site | Two-site heavy maps | Medium (2 pieces) | Medium | Free site execute |
| Slow default | Any map | Low (1-2 pieces) | Low | Information gather |
| Rush execute | Tight bombsite maps | Low | Medium | Speed catches defenders off guard |
The slow default is the most underrated strategy in BloxStrike because it is not flashy and does not produce highlight-reel plays. But the slow default is where good teams gather information, identify defender positions, and set up a coordinated execute on a later round. Players who only know how to rush often plateau because the enemy adapts to their timing — the slow default breaks that pattern. For players who want to improve their overall tactical game, the BloxStrike map callout guide covers the callouts you need to communicate mid takes and site executes with your team.
Spawn-Based Reads and Round-by-Round Adaptation
The final layer of utility mastery in BloxStrike is reading the enemy's spawn and adapting your throws accordingly. Most players throw the same smoke at the same spot every round, and good defenders learn to pre-aim that smoke's edge. The teams that win consistently are the ones who throw different lineups on different rounds, based on what the enemy has shown they will do.
Reading Defender Tendencies
After 3-4 rounds, the enemy team falls into a pattern. They hold the same angles, they use the same utility, and they rotate the same way. Your job is to identify that pattern and break it. If the CT always throws a smoke at your default plant spot, switch to the alternative plant position. If the defender always holds the same off-angle on A, throw a flash that pops over their head before you swing.
The data backs this up. Community reports from the r/bloxstrike subreddit indicate that teams which vary their utility throws between rounds win roughly 20% more rounds than teams that run the same lineups every time. The variation forces defenders to react to new information each round, and reacting takes time — time your team can use to win the opening duel.
Adapting to the Enemy's Utility
The other half of the read is knowing when the enemy has run out of utility. If the enemy CT used all three of their smokes in the first four rounds, your team can take mid freely for the rest of the half. The smoke that was a guaranteed mid denial in round 1 is gone by round 5, and the mid take that was risky becomes free. Track enemy utility in your head — or with a quick callout — and the late-round mid takes become some of the easiest rounds of the game.
| Round | Typical Enemy Utility State | Your Strategic Window |
|---|---|---|
| Round 1-4 | Full utility on both sides | Slow default, test their holds |
| Round 5-8 | Mixed, eco rounds on one side | Punish weak buys with utility-heavy executes |
| Round 9-12 | Low utility on losing side | Take mid freely, force rotates |
| Round 13+ (overtime) | Reset on both sides | Full utility, treat like round 1 |
The round 9-12 window is where many rounds are won or lost because the team that tracks utility correctly will run a free mid take while the other team still thinks the smoke is there. The team that does not track will throw a smoke at a spot nobody is holding, walk into a stack, and lose the round. For a deeper look at the mistakes that come from poor utility timing, the BloxStrike common mistakes to avoid guide covers the most frequent round-throwing errors.
Frequently Asked Questions
What are the most important BloxStrike smoke spots to learn first?
Start with the smoke spots for mid control on every map you play, because the team holding mid usually decides the round. Learn one reliable mid smoke and one site-execute smoke per map, then expand to secondary lineups as you improve. The mid smokes are higher value because they apply pressure to both bomb sites at once, while a site-execute smoke only blocks one angle. Community testing confirms that mid smoke mastery transfers between maps faster than site smoke mastery, because the geometry of mid chokepoints is similar across the rotation.
How do I get better at pop-flashing in BloxStrike?
Practice the ceiling-bounce pop-flash first, because it is the most reliable mechanic across maps. The setup involves aiming at a specific pixel on the ceiling, jumping, and throwing the flash at the apex of your jump. The flash detonates almost immediately and blinds anyone looking at it. Spend 15-20 minutes in a custom match throwing pop-flashes at the same corner until the lineup is muscle memory, then move to the next spot. The BloxStrike utility system rewards repetition more than it rewards theoretical knowledge, so consistent practice matters more than understanding the underlying mechanics.
Can I win rounds without using utility in BloxStrike?
Yes, but only against teams that are worse than yours or that have also abandoned utility. Against a coordinated team, going without utility means walking into pre-aimed angles with no flash support and no smoke to block crossfires. The rounds you win will be closer and less consistent, and your overall win rate will drop. The community meta on r/bloxstrike strongly recommends buying at least one piece of utility every round, even on eco rounds, because the information and space control utility provides is worth the investment.
How do BloxStrike map spawns affect utility timing?
Map spawns are fixed for the first 10-15 seconds of each round, which means both teams know where everyone is starting. The defender spawn is closer to the bomb sites, so defenders set up first and can pre-aim common attacker angles. Attackers counter this by throwing utility during their spawn-to-site walk, so the smoke or flash lands just as the defenders arrive. The timing window is tight — about 3-5 seconds — and missing it means the utility lands too early and the defenders have already shifted to avoid it, or lands too late and the round is already decided.
What's the best BloxStrike map strategy for solo queue?
Solo queue requires a flexible strategy because you cannot coordinate utility with random teammates the way a five-stack can. The best approach is the slow default: take map control gradually, throw utility to gather information rather than commit to executes, and play for picks rather than fast site takes. Pick up your teammates' utility usage by watching the kill feed and adjusting your own throws accordingly. The slow default wins more solo queue rounds than fast executes, because the timing is more forgiving when your team is not on voice. For more on the callouts and rotations that make slow default work, the BloxStrike callout guide covers the communication basics.